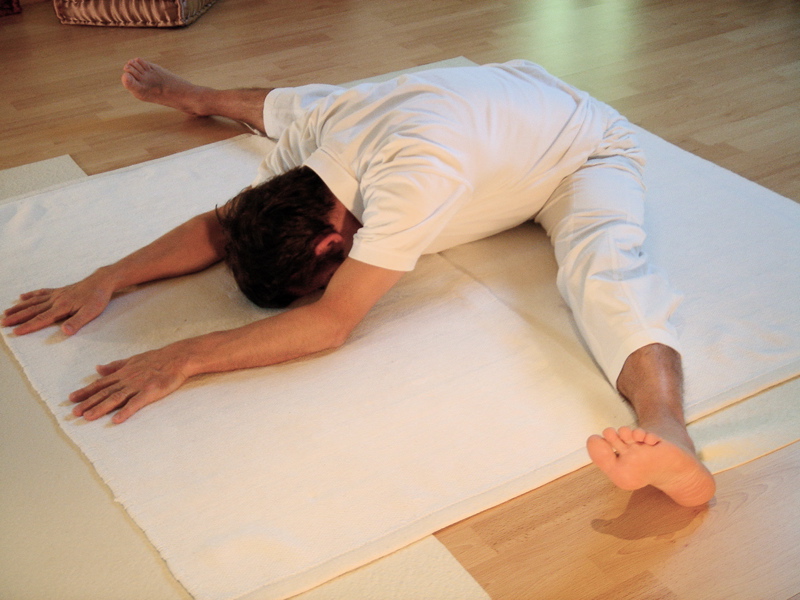
Yoga - Sitting Poses : Types, Benefits, and How to Practice


Shwaasaguru Sri Vachananand Swamiji
CC BY-SA 4.0, via Wikimedia Commons
Ardha Padmasana—Half Lotus Pose
Introduction

In the world of yoga, sitting poses (also known as seated yoga postures or meditation positions) hold a place of timeless importance. 

For thousands of years, yogis have chosen to practice in seated positions because they create stability, support spinal alignment, and allow the body to relax while the mind focuses inward.

Sitting yoga poses are often the starting point for pranayama (breath control), dhyana (meditation), and mantra chanting. In modern yoga, they are also used for stretching, improving flexibility in the hips and legs, and calming the nervous system after more active sequences.

If you’re looking to improve posture, increase hip flexibility, or simply find a comfortable position for mindful breathing, exploring these postures is a must. This guide covers the most important types of sitting yoga poses, step-by-step instructions, benefits, modifications, and precautions.

1. Sukhasana (Easy Pose)

Overview & History

Sukhasana, from Sukha (meaning "comfort" or "ease"), is perhaps the most accessible seated posture. Ancient yogic texts recommend it as a stable foundation for meditation when more complex postures aren’t comfortable.

Step-by-Step Instructions

  1. Sit on a yoga mat with legs extended.

  2. Cross your shins, placing each foot beneath the opposite knee.

  3. Rest your hands on your knees or thighs.

  4. Keep the spine tall and shoulders soft.

  5. Close your eyes or gaze gently forward.

Muscles Engaged

  • Hip rotators

  • Erector spinae (back muscles)

  • Core stabilizers

Benefits

  • Encourages a relaxed yet alert posture.

  • Opens the hips without deep strain.

  • Calms the nervous system.

Modifications

  • Sit on a folded blanket or block to elevate hips.

  • Use cushions under knees for support.

Common Mistakes

  • Rounding the back.

  • Letting knees lift excessively—support them if needed.

2. Padmasana (Lotus Pose)

Overview & History

Padmasana (Padma = "lotus") is one of the most recognized meditation poses. Symbolically, it represents purity and enlightenment in many traditions.

Step-by-Step Instructions

  1. Begin seated with legs extended.

  2. Bend the right knee, placing the foot on the left thigh.

  3. Bend the left knee, placing the foot on the right thigh.

  4. Keep knees close to the floor and spine erect.

Muscles Engaged

  • Hip flexors

  • Gluteus medius and minimus

  • Knee stabilizers

Benefits

  • Promotes stillness for deep meditation.

  • Improves hip and knee flexibility.

  • Encourages symmetrical alignment.

Modifications

  • Practice Half Lotus or Sukhasana if flexibility is limited.

  • Use blankets under each thigh.

Precautions

  • Avoid if you have knee or hip injuries.

  • Warm up hips before attempting.

Common Mistakes

  • Forcing legs into position without flexibility.

  • Leaning forward instead of staying upright.

3. Ardha Padmasana (Half Lotus Pose)

Overview

This is a gentler version of Padmasana, ideal for gradual hip opening.

Steps

  1. Sit with legs extended.

  2. Place the right foot on the left thigh.

  3. Keep the left leg bent with the foot tucked under the opposite thigh.

  4. Switch sides regularly.

Muscles Engaged

  • Hip external rotators

  • Lower back stabilizers

Benefits

  • Prepares the body for full lotus.

  • Encourages better balance in hip flexibility.

Modifications

  • Place a blanket under the hip of the raised leg.

  • Practice on both sides to avoid imbalance.

4. Vajrasana (Thunderbolt Pose)

Overview & History

Unlike cross-legged postures, Vajrasana is kneeling. Its name reflects firmness and strength (Vajra means "thunderbolt" or "diamond").

Steps

  1. Kneel with knees together.

  2. Place buttocks on heels.

  3. Keep hands on thighs and spine straight.

Muscles Engaged

  • Quadriceps

  • Tibialis anterior

  • Spinal extensors

Benefits

  • Improves digestion—can be practiced after meals.

  • Strengthens posture muscles.

  • Supports meditation and mantra chanting.

Modifications

  • Place a cushion between calves and thighs.

  • Use a block under the hips.

Common Mistakes

  • Leaning backward excessively.

  • Allowing the spine to collapse.

5. Siddhasana (Accomplished Pose)

Overview

Siddhasana is often mentioned in Hatha Yoga Pradipika as one of the best meditation postures.

Steps

  1. Sit with legs extended.

  2. Bend one knee, placing the heel near the perineum.

  3. Bend the other knee, placing the heel against the pubic bone.

  4. Keep spine erect and hands resting on knees.

Muscles Engaged

  • Hip flexors

  • Inner thighs

  • Pelvic floor

Benefits

  • Stimulates energy channels (nadis).

  • Improves mental focus.

Modifications

  • Use cushions for hip elevation.

  • Alternate leg positions regularly.

6. Baddha Konasana (Bound Angle Pose)

Overview

Also known as Cobbler’s Pose, this position opens the hips and groin.

Steps

  1. Sit with legs extended.

  2. Bring soles of feet together, knees wide.

  3. Hold the feet with hands, keeping the spine tall.

Muscles Engaged

  • Adductors

  • Hip flexors

  • Lower back stabilizers

Benefits

  • Enhances circulation in the pelvic area.

  • Reduces fatigue from prolonged standing.

Modifications

  • Place blocks under knees.

  • Practice gently rocking the knees for mobility.

7. Dandasana (Staff Pose)

Overview

This is the base posture for many seated forward bends.

Steps

  1. Sit with legs extended forward.

  2. Flex feet and engage thigh muscles.

  3. Place palms beside hips.

Muscles Engaged

  • Hamstrings

  • Quadriceps

  • Core muscles

Benefits

  • Strengthens posture awareness.

  • Improves leg flexibility.

Common Mistakes

  • Collapsing the lower back.

  • Locking knees too tightly.

8. Gomukhasana (Cow Face Pose – Seated)

Overview

Combines a deep hip stretch with shoulder opening.

Steps

  1. Sit with knees stacked one over the other.

  2. One arm reaches overhead, the other behind the back.

  3. Clasp hands or use a strap.

Muscles Engaged

  • Glutes

  • Deltoids

  • Triceps

Benefits

  • Improves flexibility in hips and shoulders.

  • Eases tension in the upper back.

Modifications

  • Use props for hands or hips.

9. Upavistha Konasana (Wide-Angle Seated Forward Bend)

Overview

A deep stretch for inner thighs and hamstrings.

Steps

  1. Sit with legs wide apart.

  2. Flex feet upward.

  3. Fold forward with a long spine.

Muscles Engaged

  • Hamstrings

  • Adductors

  • Lower back muscles

Benefits

  • Enhances flexibility in hips and legs.

  • Calms the mind.

Precautions

  • Avoid forcing forward bends.

10. Parvatasana in Sukhasana (Seated Mountain Pose)

Overview

A gentle seated spinal stretch.

Steps

  1. Sit in Sukhasana.

  2. Interlace fingers and reach overhead.

  3. Keep the spine long and ribs lifted.

Muscles Engaged

  • Latissimus dorsi

  • Erector spinae

  • Deltoids

Benefits

  • Relieves tension in shoulders.

  • Improves breathing capacity.

Practicing Sitting Yoga Poses Safely

  • Warm up hips, knees, and spine before long sitting sessions.

  • Use props to adapt each pose to your body.

  • Maintain steady, deep breathing.

  • Avoid locking joints.

  • Come out of poses slowly to protect knees and hips.

Conclusion: Building a Sitting Pose Practice

Whether you’re seeking better meditation posture, hip flexibility, or simply a more comfortable way to sit for long periods, these yoga sitting poses can transform your practice.

Start with the more accessible postures like Sukhasana or Vajrasana, then gradually explore deeper stretches like Padmasana or Upavistha Konasana as your flexibility grows. With consistency, patience, and mindful breathing, you can enjoy the physical stability and mental clarity these ancient poses have offered practitioners for centuries. 

Headstand Yoga Poses: An Useful Guide to Sirsasana and Its Variations


Ron Borkin (רון בורקין)CC BY-SA 3.0,
via Wikimedia Commons
Students Practicing Sirsasana (Headstand)
Introduction—Turning Your Practice Upside Down

The headstand (Sirsasana) is often called the king of all yoga poses for its powerful physical, mental, and energetic benefits. As one of yoga’s most iconic inversions, headstands reverse your perspective, challenge your strength and balance, and encourage a calm, focused mind.

In this complete guide, we’ll explore different headstand variations, their benefits, detailed step-by-step instructions, safety guidelines, and preparation tips so you can approach this pose with confidence—whether you’re a beginner or an intermediate yogi.

What is Sirsasana in yoga?

The term "Sirsasana" comes from Sanskrit:

  • Sirsha = head

  • Asana = posture

Headstands involve balancing on the crown of the head with the support of forearms or hands. While Salamba Sirsasana (Supported Headstand) is the most common, there are multiple variations, each offering unique challenges and benefits.

The Benefits of Headstand Yoga Poses

1. Physical Benefits

  • Builds strength in the shoulders, arms, and core.

  • Improves balance and body awareness.

  • Enhances circulation to the brain, eyes, and skin.

  • Stimulates digestion by reversing gravity’s pull on the abdominal organs.

  • Aids lymphatic drainage, helping detoxify the body naturally.

2. Mental & Emotional Benefits

  • Promotes focus and concentration.

  • Reduces stress and anxiety by calming the nervous system.

  • Encourages self-confidence and resilience.

3. Energetic Benefits

  • Stimulates the crown chakra (Sahasrara), fostering clarity and spiritual connection.

  • Balances the endocrine system by stimulating the pituitary and pineal glands.

Preparing for a Headstand

Before learning how to do a headstand in yoga, it’s essential to develop strength and stability with preparatory poses:

  • Dolphin Pose—strengthens shoulders and core.

  • Forearm Plank—builds forearm and abdominal endurance.

  • Downward Dog—stretches shoulders and hamstrings.

  • Boat Pose—reinforces core engagement.

  • Wall-assisted leg lifts—teaches control for safe inversion entry.

Step-by-Step Guide to Salamba Sirsasana (Supported Headstand)

Stage 1 — Foundation

  1. Kneel on the mat and interlace your fingers, elbows shoulder-width apart.

  2. Place forearms firmly into the ground to form a stable triangle base.

Stage 2 — Crown Placement

  1. Rest the crown of your head inside your cupped hands.

  2. Lift shoulders away from ears and press through forearms to reduce neck pressure.

Stage 3 — Hip Lift

  1. Straighten your legs and walk feet toward your head until hips stack over shoulders.

Stage 4 — Controlled Leg Lift

  1. Draw one knee toward the chest, then the other.

  2. Engage your core and keep breathing steadily.

Stage 5 — Full Extension

  1. Extend legs upward, keeping them together and active.

  2. Breathe deeply, holding for 5–10 breaths.

Stage 6 — Safe Exit

  1. Bend knees into your chest and slowly lower feet to the ground.

  2. Rest in Child’s Pose for 5–10 breaths.

Breathing Tips

  • Inhale to lift and lengthen the spine.

  • Exhale to deepen stability.

  • Maintain smooth, even breaths throughout the hold.

Popular Headstand Variations

1. Tripod Headstand (Sirsasana II)

Hands flat on the floor, head between palms—requires more arm strength.

2. Bound Hands Headstand (Baddha Hasta Sirsasana)

Hands interlaced, elbows wide—creates a strong, supportive base.

3. One-Legged Headstand (Eka Pada Sirsasana)

One leg lowers toward the ground, building balance and control.

4. Wide-Legged Headstand

Legs move into a straddle, stretching hamstrings and inner thighs.

5. Lotus Headstand (Padmasana in Sirsasana)

Legs in lotus position—requires advanced hip flexibility.

6. Scorpion Pose from Headstand (Vrischikasana)

Backbend variation—advanced and requires deep mobility.

Safety Guidelines & Contraindications

Avoid headstands if you have:

  • Neck/spine injuries

  • High blood pressure

  • Heart conditions

  • Glaucoma or eye problems

  • Osteoporosis

  • Pregnancy (unless guided by an experienced teacher)

General Safety Tips:

  • Always warm up first.

  • Use a wall for initial support.

  • Distribute weight between forearms and head.

  • Exit slowly and mindfully.

Common Mistakes to Avoid

  • Dumping weight into the head/neck instead of using forearms.

  • Kicking up too aggressively, risking falls.

  • Arching the back excessively—keep core engaged.

  • Holding your breath, which destabilizes balance.

Mini Headstand Practice Sequence

  1. Cat-Cow—1 min

  2. Dolphin Pose—1 min hold

  3. Forearm Plank—30 sec × 2

  4. Wall-assisted Headstand Prep—3 min

  5. Supported Headstand—5–10 breaths

  6. Child’s Pose—1 min

  7. Seated Forward Fold—1 min

The Mental Journey

Headstands teach patience, trust, and resilience. They’re not just about being upside down—they’re about staying grounded in focus and calm even in challenging situations.

Conclusion—More Than Just an Inversion

Headstand yoga poses are transformative for both body and mind. With proper preparation, safe alignment, and consistent practice, you can enjoy the benefits of Sirsasana—from enhanced circulation to improved mental clarity—while building strength, stability, and confidence.

Remember, the journey toward a headstand is as valuable as the pose itself. Take your time, listen to your body, and enjoy every stage of the process.

Forward Bend Yoga Poses: Types, Benefits and Alignment

Introduction

Nicholas A. Tonelli from Pennsylvania, USA,
 
CC BY 2.0, via Wikimedia Commons
Half-bound lotus forward bend
Forward bend yoga poses—also called forward folds—are among the most calming, grounding, and flexibility-enhancing postures in yoga. 

These asanas involve hinging at the hips and lengthening the spine forward, often allowing the upper body to rest over the legs. 

They can be done standing, seated, or even lying down, making them versatile and accessible for most levels.

In this guide, we’ll explore different types of forward bend yoga poses, their benefits, step-by-step instructions, variations, and tips for safe practice.

What Are Forward Bend Yoga Poses?

Forward bends are postures where the torso moves toward the legs, with the movement initiated from the hips rather than the waist. The key is to lengthen the spine instead of collapsing it, allowing for a deep but safe stretch. These poses can be

  • Standing forward bends (e.g., Uttanasana)

  • Seated forward bends (e.g., Paschimottanasana)

  • Wide-legged forward bends (e.g., Prasarita Padottanasana)

  • One-legged forward bends (e.g., Janu Sirsasana)

Benefits of Forward Bend Yoga Poses

Forward folds are much more than stretches for the hamstrings. They provide a holistic range of benefits for body and mind:

1. Physical Benefits

  • Hamstring and calf flexibility: Forward bends stretch the posterior chain muscles.

  • Spinal decompression: Helps relieve tension in the back.

  • Hip mobility: Opens up the hip joints and improves circulation.

  • Digestive stimulation: The mild compression of the abdomen can aid digestion.

2. Mental Benefits

  • Calming effect: Forward bends activate the parasympathetic nervous system, reducing stress.

  • Mindfulness practice: They encourage inward focus, perfect for meditative moments.

3. Postural Awareness

  • Forward folds train the body to hinge from the hips, protecting the lower back.

Key Principles for Practicing Forward Bend Poses

Before diving into the poses, here are essential points to remember:

  1. Hinge at the hips, not the waist. This preserves the integrity of the spine.

  2. Keep the spine long. Imagine extending your crown forward instead of collapsing down.

  3. Micro-bend the knees if hamstrings are tight to avoid overstretching.

  4. Engage the core to support the lower back.

  5. Use props such as blocks, straps, or bolsters for support.

Different Types of Forward Bend Yoga Poses

1. Uttanasana (Standing Forward Bend)

Sanskrit Meaning:
Uttana = intense stretch, and asana = pose.

How to Do It:

  1. Stand tall with feet hip-width apart.

  2. Inhale, lengthen the spine.

  3. Exhale, hinge at the hips, and fold forward.

  4. Allow the head to hang heavy, neck relaxed.

  5. Hands can rest on the floor, shins, or blocks.

Benefits:

  • Stretches hamstrings and calves.

  • Eases tension in the spine.

  • Calms the mind.

Variations:

  • Ardha Uttanasana (Half Forward Bend)—keep the back flat and hands on shins.

  • Ragdoll Pose – bend knees generously and hold opposite elbows.

2. Paschimottanasana (Seated Forward Bend)

Sanskrit Meaning:
Paschima = west (back side of the body), uttana = intense stretch.

How to Do It:

  1. Sit with legs extended straight in front.

  2. Inhale, lengthen the spine.

  3. Exhale, hinge forward from the hips.

  4. Hold feet, ankles, or shins, keeping back long.

  5. Rest in the pose for 5–10 breaths.

Benefits:

  • Stretches the entire back body.

  • Improves digestion.

  • Soothes the nervous system.

Variations:

  • Use a strap around feet if flexibility is limited.

  • Bend knees slightly for comfort.

3. Janu Sirsasana (Head-to-Knee Forward Bend)

LYUvivekkarangiya, CC0,
via Wikimedia Commons
Sanskrit Meaning:
Janu = knee, sirsa = head.

How to Do It:

  1. Sit with legs extended.

  2. Bend the right knee and place the sole of the foot against the left inner thigh.

  3. Inhale, lengthen spine.

  4. Exhale, and fold over the extended leg.

  5. Repeat on the other side.

Benefits:

  • Stretches hamstrings and groin.

  • Calms the mind.

  • Improves flexibility in hips.

4. Prasarita Padottanasana (Wide-Legged Forward Bend)

Nicholas A. Tonelli from Northeast Pennsylvania,
 USA
CC BY 2.0, via Wikimedia Commons
Sanskrit Meaning:
Prasarita = spread, pada = foot, uttana = intense stretch.

How to Do It:

  1. Stand with feet wide apart.

  2. Inhale, lengthen spine.

  3. Exhale, hinge forward, placing hands on the floor or blocks.

  4. Relax the head and neck.

Benefits:

  • Strengthens and stretches legs.

  • Improves spinal flexibility.

  • Great for building balance.

5. Upavistha Konasana (Seated Wide-Angle Forward Bend)

Joseph RENGERCC BY-SA 3.0,
via Wikimedia Commons
How to Do It:

  1. Sit with legs spread wide.

  2. Flex toes toward the sky.

  3. Inhale, lengthen spine.

  4. Exhale, and fold forward between the legs.

Benefits:

  • Opens hips and inner thighs.

  • Stretches hamstrings deeply.

  • Calms the mind.

6. Ardha Baddha Padma Paschimottanasana (Half Bound Lotus Forward Bend)

Drchirag patelCC BY-SA 3.0,
via Wikimedia Commons
How to Do It:

  1. Sit with legs extended.

  2. Place one foot in half-lotus position.

  3. Reach the same-side arm behind to hold the foot.

  4. Fold forward over the extended leg.

Benefits:

  • Combines hip opening with forward bending.

  • Improves flexibility in shoulders.

7. Balasana (Child’s Pose)

While not an intense forward bend, it’s a restorative variation.

How to Do It:

  1. Kneel on the mat.

  2. Sit back on your heels.

  3. Fold forward, resting forehead on the floor.

  4. Arms can be forward or by the sides.

Benefits:

  • Gently stretches the back.

  • Relieves stress.

  • Restorative and safe for most people.

Common Mistakes in Forward Bend Poses

  1. Rounding the back excessively. Leads to spinal strain.

  2. Locking the knees. Increases risk of injury.

  3. Pulling too hard. Forward bends are best approached with patience.

  4. Forgetting to breathe. Breath helps deepen the stretch gradually.

Safety Tips for Beginners

  • Warm up with gentle stretches before deep forward bends.

  • Avoid bouncing or forcing yourself deeper.

  • Pregnant practitioners should avoid deep compressive forward folds.

  • People with lower back issues should consult a healthcare provider before practicing.

Incorporating Forward Bends Into Your Yoga Routine

  • Use them in warm-ups to gently lengthen hamstrings.

  • Include them in cool-downs for relaxation.

  • Pair with backbends for balanced practice.

Conclusion

Forward bend yoga poses are not just about touching your toes—they’re about cultivating patience, mindfulness, and a deeper connection to your body. Whether you practice Uttanasana in the morning to wake up the hamstrings or Paschimottanasana in the evening to unwind, forward folds offer a powerful blend of physical and mental benefits.

By practicing with correct alignment, using props when needed, and focusing on breath, beginners and intermediate practitioners can safely enjoy the transformative effects of these poses.