YOGA POSTURES :

Vrischikasana
AnkurKapoorCC BY-SA 4.0,
via Wikimedia Commons
Introduction

Yoga is a centuries-old practice that unites the body, mind, and spirit through a harmonious blend of postures, breathing techniques, and meditation. 

Among the vast range of yoga asanas, there are some that stand out for their beauty, complexity, and transformative power. Vrischikasana, also known as the Scorpion Pose, is one such posture.

The name comes from the Sanskrit words Vrischika, meaning “scorpion,” and asana, meaning “pose” or “posture.” 

When performed correctly, the shape of the body resembles a scorpion, with the arched back and bent legs imitating the curve of a scorpion’s tail poised to strike. 

This pose is an advanced inversion that combines balance, flexibility, and strength, offering a deep physical and mental challenge.

The Meaning and Symbolism of Vrischikasana

In yogic tradition, animal-inspired postures are more than just physical imitations—they carry symbolic meaning. The scorpion is known for its defensive power, patience, and precision. Practicing Vrischikasana can help cultivate these same qualities in the practitioner: mental focus, courage, and the ability to control energy with intention.

From a spiritual perspective, inversions like Vrischikasana are said to reverse the flow of energy, stimulate the higher chakras, and help the practitioner see the world from a new perspective—both literally and metaphorically.

How to Do Vrischikasana (Scorpion Pose): Step-by-Step Guide

Before attempting the Scorpion Pose, it’s important to warm up your body thoroughly. Prepare with stretches for the shoulders, spine, wrists, and hips. Inversions such as the forearm stand (Pincha Mayurasana) are excellent preparatory poses.

Important: This is an advanced pose and should ideally be learned under the guidance of an experienced yoga instructor. Beginners should first master foundational inversions before attempting Vrischikasana.

Vrischikasana
AnkurKapoorCC BY-SA 4.0,
via Wikimedia Commons

Step 1: Starting Position

  1. Begin in a kneeling position on your yoga mat. Keep your spine neutral and take a few deep breaths to center yourself.

  2. Lean forward and place your forearms on the floor, shoulder-width apart.

  3. Ensure your elbows are directly under your shoulders and your palms are flat on the mat, facing downward.

Step 2: Forearm Balance Preparation

  1. Move your head slightly forward so it’s positioned beyond your hands.

  2. Keep your gaze focused on a point slightly ahead of your mat—this will help with balance.

  3. Lift your hips and straighten your legs, coming up onto the balls of your feet, similar to the setup for Pincha Mayurasana.

Step 3: Lifting Into the Pose

  1. Inhale deeply and engage your core muscles.

  2. With control, kick or swing both legs upward into a vertical position over your head.
    Tip: If you are new to this, practice near a wall for support.

  3. Once balanced, make sure your body is stable before proceeding.

Step 4: Creating the Scorpion Shape

  1. Slowly bend your knees and arch your back, bringing your feet toward your head.

  2. Keep your chest open and your neck long, looking slightly forward or upward.

  3. Your toes should ideally hover above or lightly touch the back of your head, creating the “scorpion tail” curve.

Step 5: Holding the Pose

  1. Maintain deep, steady breathing.

  2. Hold the posture for 10 to 20 seconds initially, gradually increasing the duration as your strength and balance improve.

  3. Avoid straining—quality is more important than quantity.

Step 6: Releasing the Pose

  1. To exit, carefully straighten your legs back into a forearm stand.

  2. Lower one leg at a time to the floor, returning to a kneeling position.

  3. Rest in Child’s Pose (Balasana) for a few breaths to allow your body to recover.

Half Scorpion Pose (Ardha Vrischikasana)

If the full Scorpion Pose feels too challenging, you can start with the Half Scorpion Pose (Ardha Vrischikasana). In this variation, you keep one leg lifted vertically while the other leg remains bent toward the head. This builds strength, flexibility, and confidence without requiring full backbend mobility.

Benefits of Vrischikasana (Scorpion Pose)


ShivPrakash ChamolaCC BY-SA 4.0, via Wikimedia Commons
Vrischikasana is more than a show of physical ability—it offers profound benefits for the body and mind when practiced regularly and mindfully.

1. Builds Arm and Shoulder Strength

Balancing your entire body on your forearms demands significant strength from your arms, shoulders, and wrists. Over time, this pose helps tone and strengthen these muscles, improving your ability to perform other challenging asanas.

2. Strengthens the Core

The core is the powerhouse of this pose. Engaging the abdominal and lower back muscles helps maintain balance, stability, and control, which improves posture and reduces the risk of back pain in daily life.

3. Enhances Spine Flexibility

The deep backbend in Vrischikasana stretches and strengthens the spine, increasing flexibility and mobility. This can help counteract stiffness caused by sedentary lifestyles.

4. Improves Balance and Coordination

Balancing upside down challenges the body’s proprioception (awareness of position in space). Over time, this sharpens coordination, reflexes, and body awareness.

5. Boosts Circulation

Being inverted increases blood flow to the brain, providing a fresh supply of oxygen and nutrients. This can lead to improved focus, mental clarity, and even a sense of mental refreshment.

6. Stimulates the Nervous System

The pose’s inversion and backbend stimulate the central nervous system, helping to improve energy levels, combat fatigue, and boost mood.

7. Supports Abdominal Health

Engaging the abdominal muscles while inverted helps tone the belly and may aid in digestion by stimulating internal organs.

8. Builds Confidence and Mental Strength

Mastering Vrischikasana requires patience, determination, and courage. Overcoming the fear of falling and developing the strength to hold the pose can boost self-confidence and mental resilience.

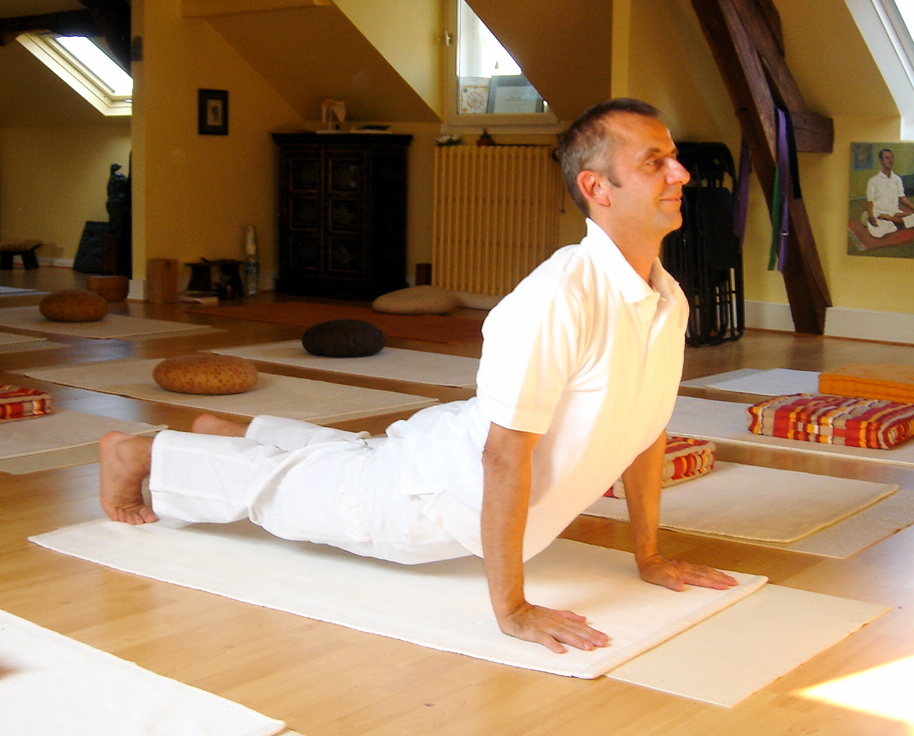
Safety Tips for Practicing Vrischikasana


lululemon athletica
 
CC BY 2.0,
via Wikimedia Commons
Because Vrischikasana is an advanced yoga pose, it comes with certain risks if not practiced correctly. Keep the following guidelines in mind:

  • Warm Up Thoroughly: Prepare your shoulders, spine, and wrists before attempting the pose.

  • Use a Wall for Support: Especially in the early stages, practicing against a wall can prevent falls.

  • Engage Core Muscles: This protects your lower back from strain.

  • Avoid Jerky Movements: Enter and exit the pose slowly and with control.

  • Listen to Your Body: If you feel pain or dizziness, come out of the pose immediately.

  • Avoid If Injured: Those with wrist, shoulder, back, or neck injuries should avoid this posture.

  • Consult a Professional: If you have high blood pressure, heart conditions, or are pregnant, skip inversions like this.

Preparatory Poses for Vrischikasana

Before attempting Vrischikasana, it’s helpful to build the necessary strength and flexibility with these preparatory poses:

  • Forearm Stand (Pincha Mayurasana)

  • Dolphin Pose

  • Wheel Pose (Urdhva Dhanurasana)

  • Camel Pose (Ustrasana)

  • Bow Pose (Dhanurasana)

  • Plank Variations

Counter Poses After Vrischikasana

After performing Vrischikasana, follow up with gentle counter poses to relax the muscles and neutralize the spine:

  • Child’s Pose (Balasana)

  • Seated Forward Bend (Paschimottanasana)

  • Cat-Cow Stretch (Marjaryasana-Bitilasana)

Vrischikasana in the Context of Yoga Practice

In yoga, advanced postures like Vrischikasana are not about competition or performance. They are a personal journey of discipline, awareness, and growth. Attempting such poses should always be balanced with humility and patience. The journey to mastering Scorpion Pose can take months or even years, but every small step along the way brings valuable physical and mental benefits.

Final Thoughts

Vrischikasana is a beautiful, powerful, and challenging yoga asana that demands strength, flexibility, and mental focus. Its scorpion-like shape is more than a physical achievement—it is a symbol of transformation, resilience, and control over one’s own energy. By approaching this pose with patience, respect for your body, and consistent practice, you can unlock both its physical benefits and its deeper, meditative rewards. Remember: the goal is not to perfect the pose overnight but to enjoy the process of becoming stronger, more flexible, and more mindful with each attempt.


When we are practising Yoga Asanas regularly, we have decided to have all the benefits available by practicing the same. Diet comes first. The intake of the food should be devised in such a way that it supplements the benefits of yoga exercises. The composition of the diet should be a balanced diet and of vegetarian quality, as yoga denies any kind of violence. The food arrived through the process of killing another soul on the earth, which could not help our wellness; that is what yoga believes. So no meat and fish.

YOGA POSTURES: Surya Namaskar, Kundalini Yoga

Surya Namaskar: The Complete Guide to Sun Salutation Yoga Pose


Joseph RENGERCC BY-SA 3.0,
via Wikimedia Commons
Surya Namaskar, also known as Sun Salutation, is a foundational sequence in yoga that seamlessly blends twelve powerful yoga postures (asanas) into one dynamic flow. Practiced for centuries, this graceful set of movements is designed to harness the energy of the sun, invigorate the body, and calm the mind. 

It is one of the most effective and comprehensive exercises that not only tones the muscles and improves flexibility but also boosts mental well-being and spiritual growth.

In this detailed essay, we will explore the Sun Salutation in-depth, including its composition, step-by-step instructions on how to perform it, the ideal time for practice, its spiritual and physical benefits, and tips to maximize its impact. This 3000-word guide is your go-to source for understanding and integrating Surya Namaskar into your daily yoga practice.

What is Surya Namaskar (Sun Salutation)?

4godhapitham (l‘iguane)
Joseph RENGERCC BY-SA 3.0,
via Wikimedia Commons

Surya Namaskar is a sequence of twelve asanas performed in a rhythmic flow, synchronized with controlled breathing. The name "Surya" means "Sun" and "Namaskar" means "Salutation" or "Greeting." This yoga practice is both a physical workout and a spiritual ritual that pays homage to the life-giving solar energy.

Traditionally performed at sunrise facing the sun, Surya Namaskar is believed to activate the solar plexus at the navel, considered the central point of the human body. Regular practice balances energy channels, improves blood circulation, enhances digestion, and purifies the mind.

How to Perform Surya Namaskar: Step-by-Step Instructions


Joseph RENGERCC BY-SA 3.0,
via Wikimedia Commons
Each round of Surya Namaskar, commonly known as Sun Salutation, is a dynamic and graceful sequence comprising 12 distinct yoga postures

This flowing series is designed to synchronize breath with movement, offering a comprehensive full-body workout that warms up the muscles, improves flexibility, and strengthens the core. 

The sequence systematically engages every major muscle group, moving through a range of motions that stretch, extend, and contract the body. Beyond the physical benefits, these 12 postures, when performed in a continuous flow, also help to calm the mind, enhance focus, and invigorate the spirit, making Surya Namaskar a powerful practice for holistic well-being. 

Here is a detailed guide to each pose:

  1. Pranamasana (Prayer Pose)

    • Stand at the edge of your mat with feet together.

    • Balance your weight equally on both feet.

    • Expand your chest and relax your shoulders.

    • Inhale and lift both arms up, then exhale and bring palms together in front of your chest in a prayer position.

  2. Hasta Uttanasana (Raised Arms Pose)

    • Inhale, lift your arms up and back, keeping the biceps close to the ears.

    • Stretch the whole body upward from the heels to the tips of the fingers.

  3. Hasta Padasana (Hand to Foot Pose)

    • Exhale and bend forward from the waist.

    • Keep the spine erect as you bring the hands down to the floor beside your feet.

  4. Ashwa Sanchalanasana (Equestrian Pose)

    • Inhale, step the right leg back as far as possible.

    • Bend the left knee and keep the palms flat on the floor.

    • Look up, opening the chest.

  5. Dandasana (Stick Pose)

    • Exhale and step the left leg back to come into a plank position.

    • Keep the body in a straight line.

  6. Ashtanga Namaskara (Salute with Eight Parts)

    • Gently lower your knees, chest, and chin to the floor.

    • Keep your hips slightly raised.

    • Eight parts touch the ground: two feet, two knees, chest, chin, and two hands.

  7. Bhujangasana (Cobra Pose)

    • Slide forward and raise the chest.

    • Keep the elbows bent and shoulders away from the ears.

    • Look upward gently.

  8. Adho Mukha Svanasana (Downward-Facing Dog)

    • Exhale and lift the hips to form an inverted "V."

    • Keep the heels pressed down and the spine elongated.

  9. Ashwa Sanchalanasana (Equestrian Pose)

    • Inhale and bring the right foot forward between the hands.

    • Look up while keeping the left leg stretched back.

  10. Hasta Padasana (Hand to Foot Pose)

    • Exhale and bring the left foot forward.

    • Keep the palms on the floor and gently press the head to the knees.

  11. Hasta Uttanasana (Raised Arms Pose)

    • Inhale and lift the torso.

    • Raise the arms up and bend backward slightly.

  12. Pranamasana (Prayer Pose)

    • Exhale and return to the prayer pose, completing one round.

Tip: Complete one round by leading with the right leg and another round by leading with the left leg. A complete set includes both rounds.

Best Time to Practice Surya Namaskar

The optimal time to practice Surya Namaskar is early in the morning during sunrise. This is when the air is fresh, and the body is well-rested. The mind is calm, and the sun’s energy is at its peak, making it ideal for physical and spiritual revitalization.

However, it can also be practiced in the evening before sunset, provided your stomach is empty. Practicing on an empty stomach ensures better results and avoids discomfort during the sequence.

Yoga Postures Included in Surya Namaskar

Surya Namaskar is a dynamic combination of several fundamental yoga postures:

  • Tadasana (Mountain Pose)

  • Urdhva Hastasana (Upward Salute)

  • Uttanasana (Standing Forward Bend)

  • Ashwa Sanchalanasana (Low Lunge)

  • Dandasana (Plank Pose)

  • Ashtanga Namaskara (Eight Limbed Pose)

  • Bhujangasana (Cobra Pose)

  • Adho Mukha Svanasana (Downward Dog)

Each posture targets different muscle groups and energy centers, making Surya Namaskar a full-body practice.

Wholesome Benefits of Surya Namaskar

Surya Namaskar is more than just an exercise routine; it is a transformative practice. Here are its key benefits:

Physical Benefits:

  1. Improves Flexibility: The sequence stretches and strengthens all major muscle groups.

  2. Boosts Cardiovascular Health: Increases heart rate and blood circulation.

  3. Enhances Muscle Tone: Tones arms, legs, back, and abdominal muscles.

  4. Aids Weight Loss: Burns calories efficiently, especially when done in multiple sets.

  5. Improves Digestion: Massages internal organs, enhancing metabolic functions.

  6. Promotes Detoxification: Enhances blood circulation and lymphatic drainage.

  7. Corrects Posture: Aligns the spine and improves overall posture.

Mental and Emotional Benefits:

  1. Reduces Stress and Anxiety: The rhythmic breathing calms the nervous system.

  2. Enhances Focus and Concentration: Improves mental clarity and mindfulness.

  3. Boosts Mood: Releases endorphins and reduces symptoms of depression.

Spiritual Benefits:

  1. Balances Chakras: Especially activates the Manipura (solar plexus) chakra.

  2. Builds Discipline and Consistency: Cultivates a daily self-care ritual.

  3. Encourages Mindfulness and Inner Peace: Connects breath with movement, creating meditative awareness.

Tips for an Effective Surya Namaskar Practice

  • Start Slow: Begin with 2–4 rounds and gradually increase to 12 rounds.

  • Focus on Breath: Synchronize each movement with inhalation or exhalation.

  • Maintain Consistency: Practice daily for best results.

  • Modify as Needed: Beginners can use props or modify poses to suit their level.

  • End with Relaxation: Always conclude with a few minutes of Savasana (Corpse Pose).

Surya Namaskar Variations

While the classical version is widely practiced, there are several variations:

  • Hatha Surya Namaskar – Focuses on slow and mindful movements.

  • Ashtanga Surya Namaskar A & B – More dynamic, part of Vinyasa style.

  • Power Yoga Version – Faster-paced for cardio benefits.

  • Chandra Namaskar (Moon Salutation) – A calming counterpart to the Sun Salutation.

Conclusion: Embrace the Light Within

Surya Namaskar is more than a physical routine—it is a ritual of gratitude and self-awareness. Practicing it daily not only strengthens your body but also nourishes your mind and soul. With just 15–30 minutes of practice a day, you can transform your health, enhance your mood, and find deeper spiritual connection.

Whether you are a beginner or an experienced yogi, Surya Namaskar is a timeless gift that aligns your body with the rhythm of nature. Start your journey with a few rounds, and let the rising sun guide your path to wellness and inner peace.

Incorporate Sun Salutation into your morning ritual, and awaken the divine energy within you—one breath, one pose at a time.

Caution: Pregnant women should do this posture after taking proper instructions from a trained teacher.

Some important words used in this composition : Surya Namaskar, Sun Salutation, Yoga for beginners, Benefits of Surya Namaskar, How to do Sun Salutation, Yoga poses, Morning yoga routine, Spiritual benefits of yoga, Surya Namaskar steps, Weight loss yoga, Best yoga sequence.